
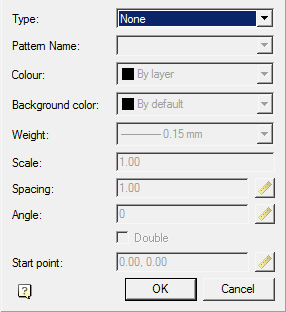
Parameters hatch
In the dialogs for editing nanoCAD Construction objects, there may be a  “Hatch” button, which opens the “Hatch” editing dialog.
Procedure
1. Select a hatch type:

None – hatch will not;
- Predefined – hatch is selected by abrasive from the list of standard hatches;
- Custom – hatch is selected by abrasive pattern from the list of custom hatches;
- User-Defined – hatching is formed in the form of parallel lines with a set interval and rotation angle. When you turn on the “Double” switch, the second row of lines will be drawn perpendicular to the first.
2. Select a hatch pattern (if possible). Depending on the selected sample, certain parameters will become available.

3. Configure the available options.
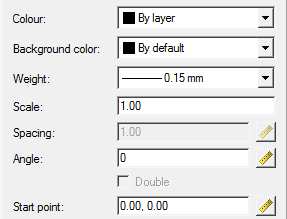
4. Click the “OK” button. The hatching will be adjusted and added to the appropriate location.
Feedback
Copyright © 2026 CSoft AS
—
Powered by 
Post your comment on this topic.