
Set show boundary for a viewport
 Ribbon: Insert – Reference – Clip >
  Viewport Clip
Menu: Modify – Clip >  Viewport
 Command line: VPCLIP
This command allows you to change the border of the created layout viewport.
When you select a viewport, the Viewport command will be available from the context menu:
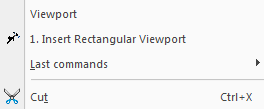
Use the command to clip the border of the viewport and objects displayed on the viewport. The show boundary only defines the objects’ visibility option in the viewport, the objects do not change on the drawing.
Options:
| ? | Calls additional options to select the objects. |
|---|---|
| Polygonal | Set the polygonal contour of the show boundary by specifying all the polygon vertices. |
| Undo | Undo the specified points of the polygon vertices. The start point cannot be undone. |
| Object | Set the boundary contour by specifying the closed object. The object should already be created. You can use circles, ellipses, closed polylines and closed splines as objects. |
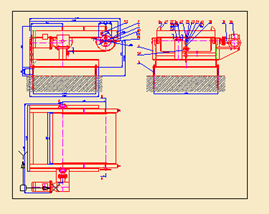
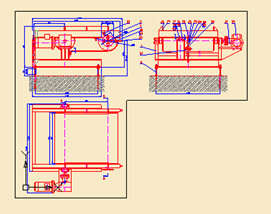
Viewport before setting the display boundary  Viewport display after setting a polygonal display boundary
Command prompts when you set polygonal boundary:
| Command prompts when you set polygonal boundary: | Select the viewport. |
|---|---|
| Specify clipping option or [Polygonal/Object/Delete]: | Select the Polygonal option. |
| Specify start point: | Specify the start point. |
| Specify next point or [Undo]: | Specify the second point. |
| Specify next point or [Undo]: | Specify the end point and press ENTER. |
Command prompts when you set boundary by object:
| Select viewport to apply action or [?]: | Select the viewport. |
|---|---|
| Specify clipping option or [Polygonal/Object/Delete]: | Select the Object option. |
| Select closed object to create viewport: | Select the closed object. |
Feedback
Copyright © 2024 CSoft AS
—
Powered by 
Post your comment on this topic.