
Groups of objects
Object Grouping Dialog
 Ribbon: Home – Group >
  Dialog for Creating Groups
Toolbar: Group – Dialog for Creating Groups
 Command line: G, CLASSICGROUP, GROUPCMD
The command opens the Object Grouping dialog box where there is a list with the names of existing groups in the document and descriptions for every group that is selectable:
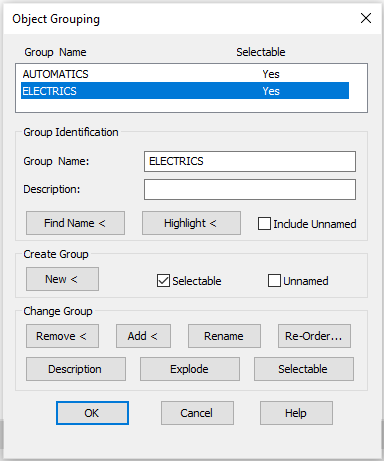
Parameters:
Group Identification
| Group Name: | Specify a group name. |
|---|---|
| Description: | Displays the description of the group (if it was specified during group creation). |
 |
This button temporarily closes the dialog box for selecting an object when you need to clarify its group. |
 |
This button temporarily closes the dialog box for highlighting a group’s objects on the screen. |
| Including Unnamed | Switches on/off the input of unnamed groups in the list in the Object Grouping dialog box. |
Create Group
 |
This button temporarily closes the dialog box for selecting the objects of a group. |
|---|---|
| Selectable | Switches on/off the mode of whole group selection if one object is selected. |
| Unnamed | Switches on/off the mode for creating unnamed groups. |
Change Group
 |
This button temporarily closes the dialog box to allow selecting objects to delete from the selected group. |
 |
This button temporarily closes the dialog box to allow selecting objects to add them to the selected group. |
 |
This button updates a change of name for a group. |
 |
This button opens the Order Group dialog box to change the order of objects in a group. |
 |
This button updates the changed description for the selected group. |
 |
This button deletes the selected group. Objects of the group are not deleted from the document. |
 |
This button changes the selectable property of a group in the document. |
To create a group:
1. Enter the name for the created group and its description in the Group Name and Description fields of the Group Identification section. A name can contain letters, figures and special symbols, but must not contain spaces. The Description field can be empty.
2. Select the New button to temporarily close the dialog box to select the objects of a group.
3. Select the objects, press ENTER.
4. Select OK in the opened dialog box.
To identify a group:
1. To define the groups the object belongs to, select the Find Name<.
2. After the dialog box temporarily closes, specify an object on the screen.
3. The Group Member List dialog box opens with all groups the selected object belongs to:
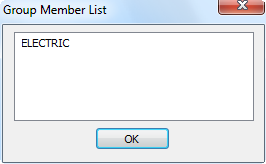
4. Select OK to get return to the previous dialog box.
5. Select OK to close the dialog box.
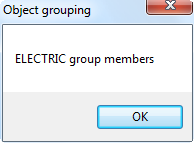
The Highlight< button temporarily closes the dialog box to allow highlighting of a group’s objects on the screen. The Object grouping dialog box is displayed with the highlighted object:
To delete objects from a group:
1. Select a group in the list.
2. Deselect the Selectable checkbox.
3. Select Remove<.
4. Select the objects to delete.
5. Select the End option (in the context menu or command line).
6. Select OK to close the dialog box.
NOTE: When adding objects belonging to other groups to a group, the Selectable checkbox should be deselected. If it is selected, the groups that the objects belong to will be added to the group.
To rename a group or change a description:
1. Select the group.
2. Make changes in the Group Name and Description fields of the Group Identification section.
3. Select the Rename or Description.
The messages like Group name has been updated or Group description has been updated and are shown in the bottom left corner.
4. Select OK to close the dialog box.
To change the order of objects in the group:
1. Select the group.
2. Select Re-Order.
3. Specify the required parameters in the Order Group dialog box:

Parameters:
| Group Name | List of existing groups. |
|---|
Description
Shows the description of the selected group in the list (if it was specified when the group was created)
| Remove from position (0-3) | Field to enter the current position (number) of the object in the group. |
|---|---|
| Enter new position number for the object (0-3): | Specifies the new position number of objects in a group. |
| Number of objects (less than 4): | Specifies the number of objects, whose positions are changed. |
 |
This button changes the positions of objects in the group. |
 |
This button opens the Object Grouping dialog box to display the order of objects in the group. |
 |
This button changes the objects into their opposite order. |
NOTE: The order of object numbering is the order in which objects were selected when they were added to the group. Numbering starts from 0.
NOTE: You can change the positions of several objects at once.
The Highlight temporarily closes the Order Group dialog box and opens the Object Grouping dialog box:
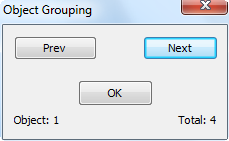
Parameters:
 |
The button for the previous object selection |
|---|---|
 |
The button for the next object selection. |
| Object: 1 | Shows the current position of the object in the group. |
| Total: 4 | Shows the current position of the object in the group. |
NOTE: A selected object is highlighted on the screen.
Info: NanoCAD is a simple, low cost, and yet powerful, CAD freeware tool for personal computer, that provides an outstanding user experience by providing high performance, full capability, a classic interface and native.dwg format support. nanoCAD has been built to deliver design and project documentation for all engineering purposes. nanoCAD includes a full suite of basic and advanced CAD tools for 2D/3D drafting and creating industry-standard DWG-compatible CAD files. Our software provides progressive, collaborative and customizable features to raise your efficiency, and includes a number of API’s, allowing anything from routine task automation to complex CAD application development. You may try nanoCad for free, using the links below, and purchase later, if you like it.
Post your comment on this topic.