
Exporting Geopoints
 Ribbon: Topoplan – Import/Export >
  Export Geopoints
Menu: Topoplan – Import/Export > Export Geopoints
Toolbar: Import/Export > Export Geopoints
 Command line: NG_EXPORT_POINTS

Options:
| Save as | Specify the storage location and name of the exported file.  |
|---|---|
| Extension | Geodata export format: CSV, SDR (Sokkia), TXT  |
| Encoding | Encoding of the exported text file.  |
| Separator | Specifies a character that separates data in a text file.  For each export format (Extension list), its own separators are available. You can choose both predefined separators (dot, comma, semicolon, tab character, space), and set any other (Other). As a result, the data of the Point data table separated by the specified character will be exported to a file. The result can be previewed in the Result field. For each export format (Extension list), its own separators are available. You can choose both predefined separators (dot, comma, semicolon, tab character, space), and set any other (Other). As a result, the data of the Point data table separated by the specified character will be exported to a file. The result can be previewed in the Result field. |
| Decimal separator | Specifies the decimal separator between the integer and fractional parts of numbers.  |
| New line character | Allows you to override the newline character.  The default character is \n. The default character is \n. |
| Selected objects | The section defines what types of drawing objects should be exported as geodata to an external file. And also whether label descriptions should be exported and from which objects.  You can export geodata simultaneously from all or selectively from the following types of objects: You can export geodata simultaneously from all or selectively from the following types of objects:· Common objects of the Simple Point type with label descriptions in the form of ordinary text objects; · Block insertions with single-line attributes as label descriptions (for example, conventional signs inserted into the drawing as blocks from the Conventional signs bar); · Objects of COGO Point type with a label. You can specify whether to generate labels for data from each object type, and where to get the values of each label description. Values for the Name label can be taken from the increment, attributes of the point itself, or from the text object nearest to the point:  If you select By point, you will need to specify from which point attribute the information should be taken. The list will show the existing attributes of the geopoint or block:  If you select Nearest text, you will need to specify the maximum distance from the point to the text object, at which this text will still be considered the label of this point:  Values for Elevation (Z-coordinate) and Code labels can be taken from the attributes of the point itself or from the text object nearest to the point:  |
| Points data | The table performs typing and editing of data obtained from point objects: point coordinates by X, Y and Z, numbers, descriptions of points. The column heading displays the data type. In case of incorrect initial data typing, you can drag one header to another, thereby mutually changing them. You can delete selected cells, rows, or columns. Multiple selection is supported using SHIFT and CTRL. Rows or columns are selected by clicking on the heading. Before manually deleting data, it is recommended to filter them out using filters. You can also edit the data after double-clicking on a cell.  |
| UPD (User Defined Properties) classification | You can add custom properties to points with the  button. You should specify the type (integer, float, or string) and name. button. You should specify the type (integer, float, or string) and name. 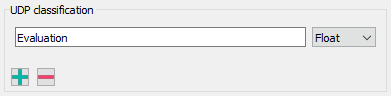 A new empty column appears in the Points Data table with the name of the custom parameter. Drag this column heading onto the heading of the column you want it to match.   |
| Filters | You can exclude data from export not only manually by deleting cells from the Points data table, but also by setting filters. For example, you can exclude from export all points with heights below 52 (Z column) and with a number greater than 350 (Name column). After adding the filter with the button, in the drop-down list, select the column by which all exported data will be filtered. Then set the value that the column data should satisfy. The rest of the lines will be excluded from the export. Hovering over the filter displays a tooltip with sample values.  It is recommended to set filters only after correct data typing in the Points data section. |
| Result | Viewing the preliminary result of exporting geodata to a text file. Selected data can be copied.  |
| Additional options | The Additional Options button opens the window where you can change settings for the units (UNITS) with which geopoints should be exported. By default, the current drawing units are used.  |
| _.Current profile | Allows you to save all the settings made in the dialog to a profile for later use.  |
Feedback
Copyright © 2024 CSoft AS
—
Powered by 
Post your comment on this topic.